
| 일 | 월 | 화 | 수 | 목 | 금 | 토 |
|---|---|---|---|---|---|---|
| 1 | 2 | 3 | ||||
| 4 | 5 | 6 | 7 | 8 | 9 | 10 |
| 11 | 12 | 13 | 14 | 15 | 16 | 17 |
| 18 | 19 | 20 | 21 | 22 | 23 | 24 |
| 25 | 26 | 27 | 28 | 29 | 30 | 31 |
- VSCode
- 개발
- 소프티어
- Flutter
- MVVM
- 자바
- 현대sw
- Python
- aws
- 알고리즘
- kotlin
- Android
- 아마존 웹 서비스
- 안드로이드
- 플러터
- SWIFT
- 다트
- 코틀린
- programers
- 프로그래머스
- 백준
- GDSC
- softeer
- baekjoon
- DART
- java
- 코테
- 머신러닝
- 스위프트
- 파이썬
- Today
- Total
조준장 개발자 생존기
[kotlin] 코틀린 Fragment와 navigation bar 생성 본문
코틀린에서 Fragment로 navigation bar를 생성하는 방법에 대해 알아보도록 하겠습니다.
Fragment란 하나의 Activity 안에 여러 개의 분할된 화면을 만들기 위해 개발된 개념입니다. Fragment는 하나의 디스플레이 화면 안에서 다양한 화면을 보여주고 다른 Activity에서도 재사용할 수 있다는 장점이 있습니다. 이처럼 전체 화면인 Activity에서 분할된 화면을 만들 때 주로 사용되는데 사람들이 많이 하는 어플리케이션인 카카오톡, 페이스북, 인스타그램 등에서도 사용되는 것을 확인할 수 있습니다.
그러면 navigation bar를 사용하여 하단 탭을 구성하고 Fragment로 여러 개의 분할된 화면을 만들어보도록 하겠습니다.
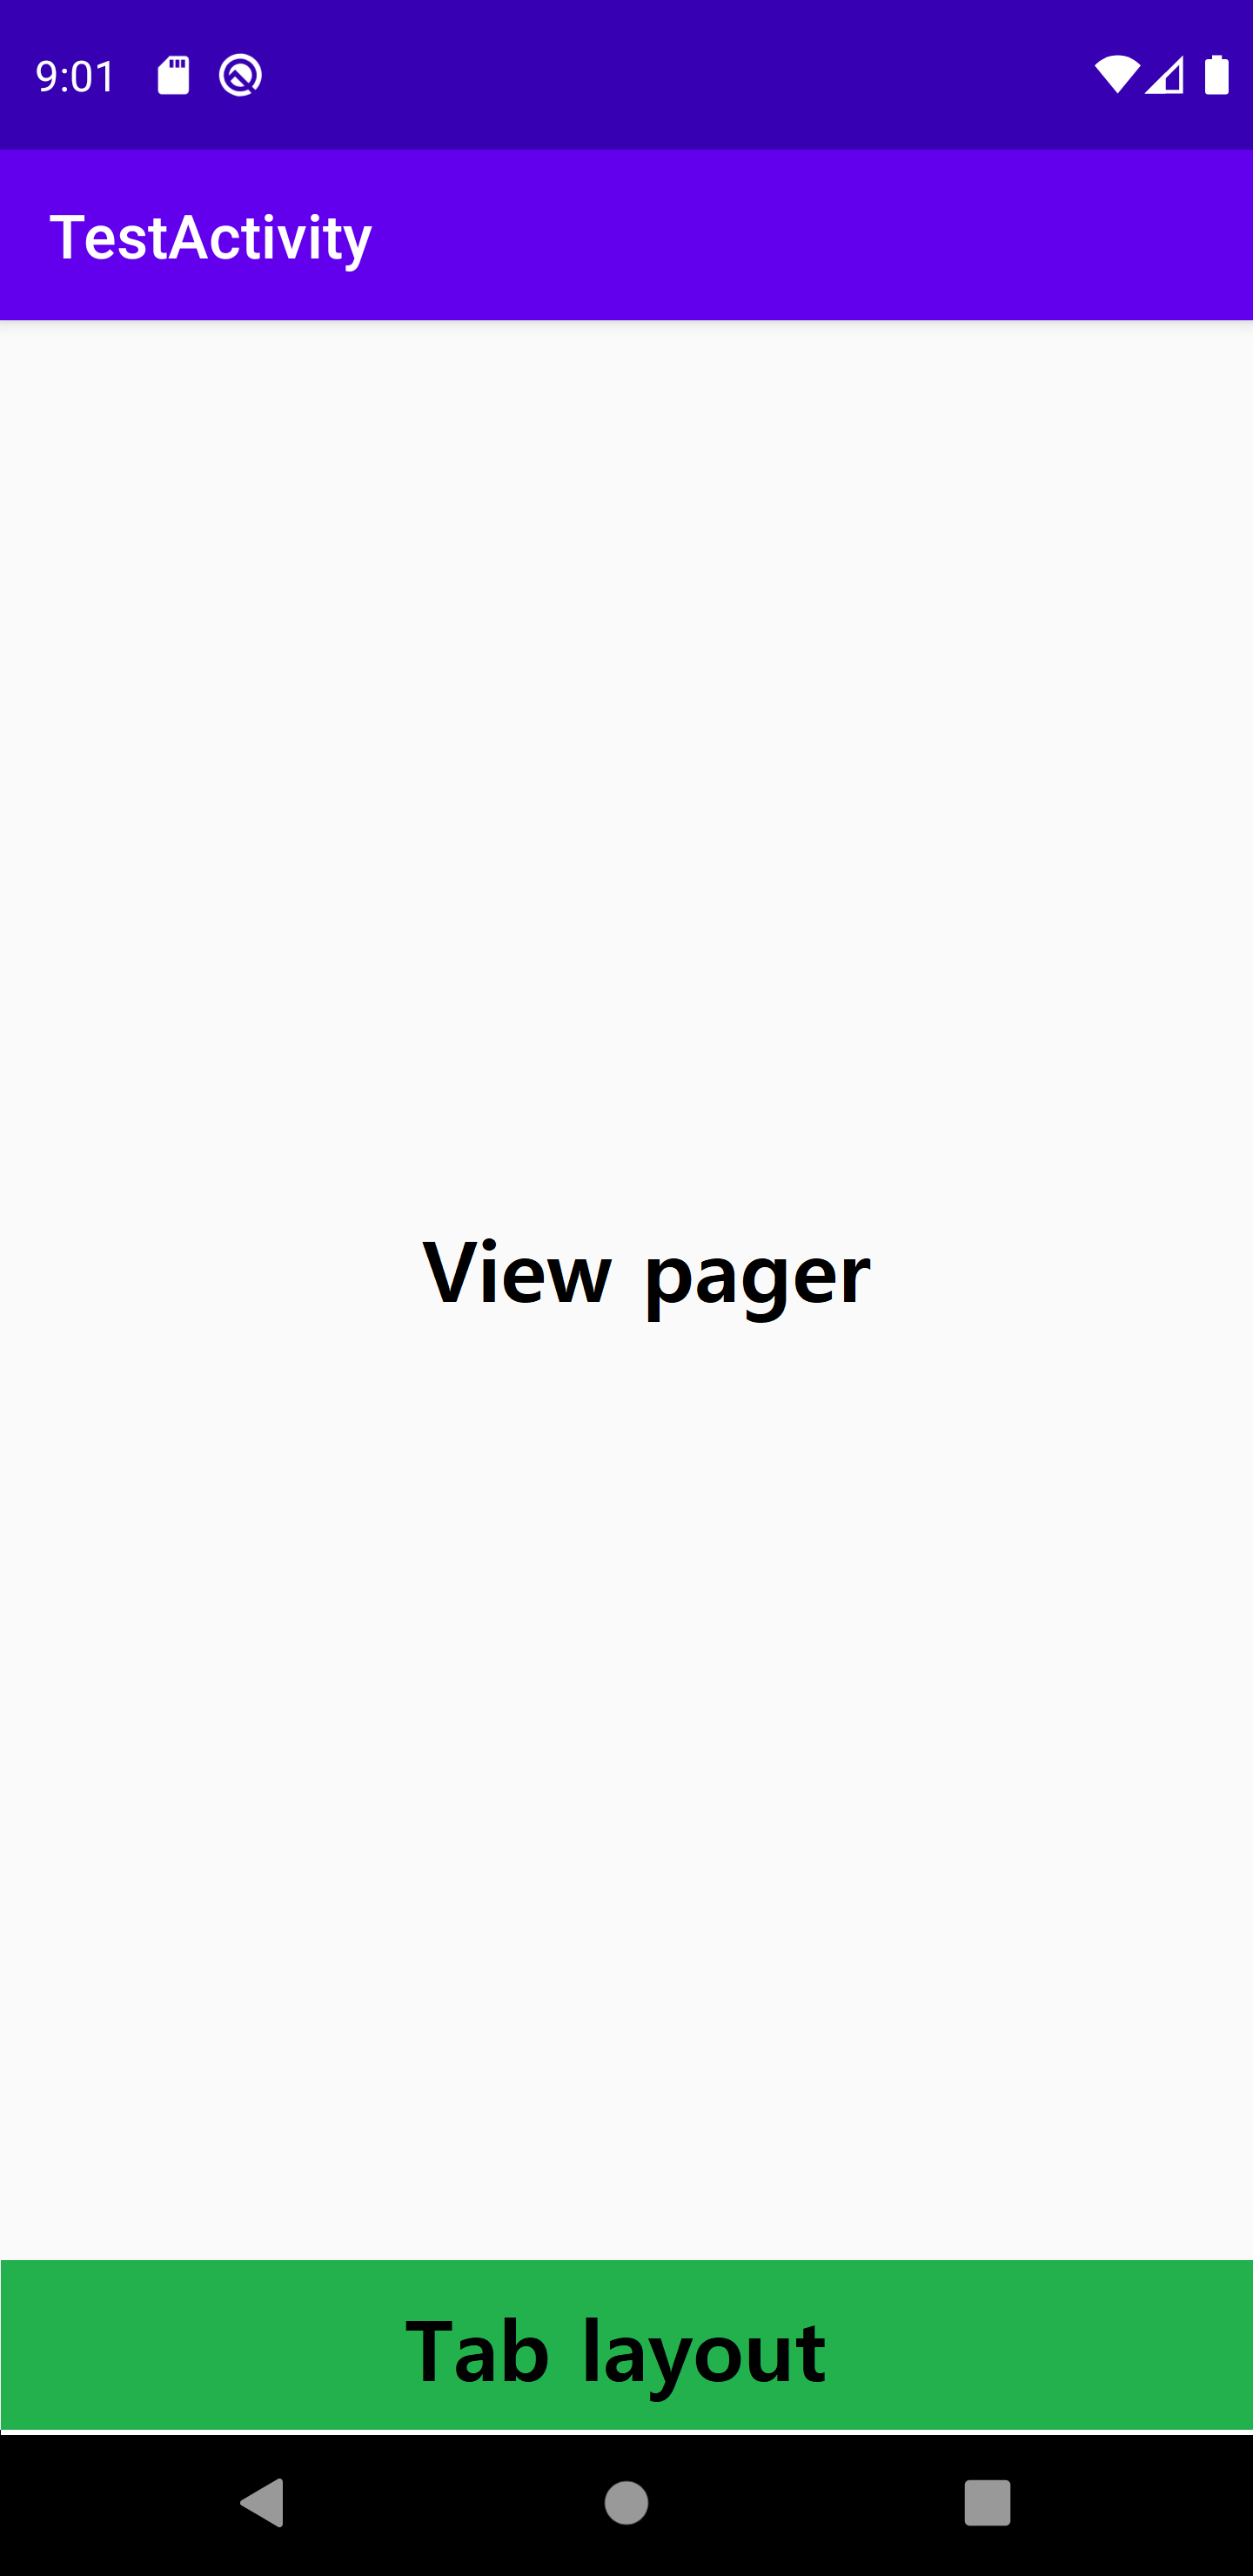
위 사진처럼 navigation bar는 Tab layout과 View pager를 이용하여 만들어보도록 하겠습니다.
그럼 제일 먼저 라이브러리부터 추가해보도록 하겠습니다.
라이브러리를 추가하는 방법은 2가지 방법이 있는데,
첫 번째 방법인 Project Structure를 이용하여 라이브러리를 추가해보도록 하겠습니다.
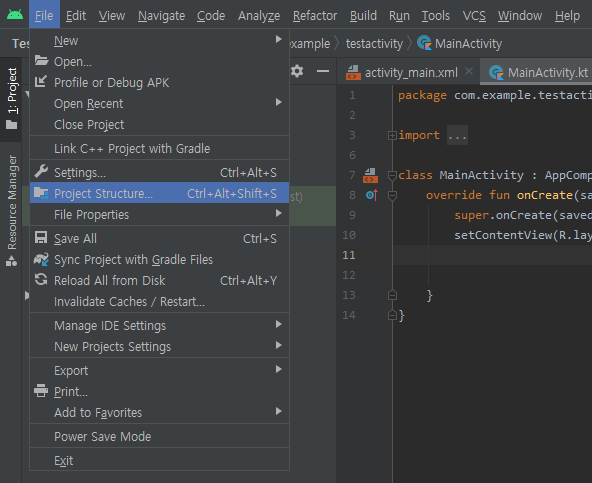
상단에 File -> Project Structure을 클릭해 줍니다.
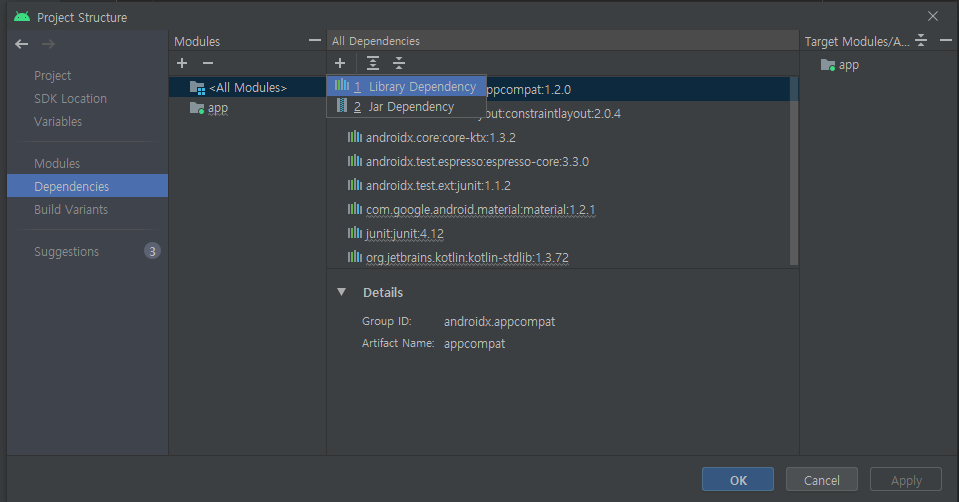
Project Structure 창이 뜨면 옆에 있는 Dependencies를 클릭해 줍니다.
그러면 위 사진처럼 나오게 되는데 이때, All Dependencies에 있는 +를 눌러준 후, Linbrary Dependency를 클릭해 줍니다.
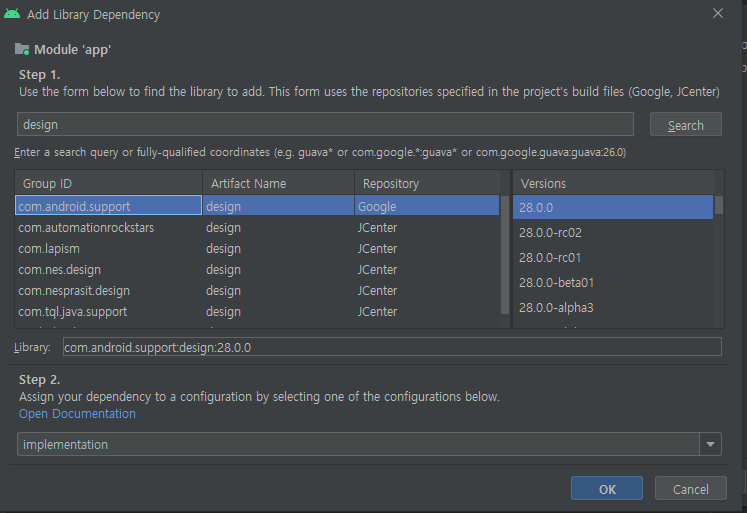
위 사진처럼 Add Library Dependency 창이 뜨면
검색창에 design을 검색합니다. design을 검색하게 되면 Group ID가 com.android.support인 라이브러리가 나오는데 그것을 클릭한 후, ok버튼과 Apply버튼을 클릭해주어 라이브러리를 추가해줍니다. 라이브러리를 추가했다면 Project Structure를 이용하여 라이브러리를 추가하는 방법이 끝이 납니다.
다음으로는 두 번째 방법인 build.gradle에 직접 입력하여 라이브러리를 추가해보도록 하겠습니다.
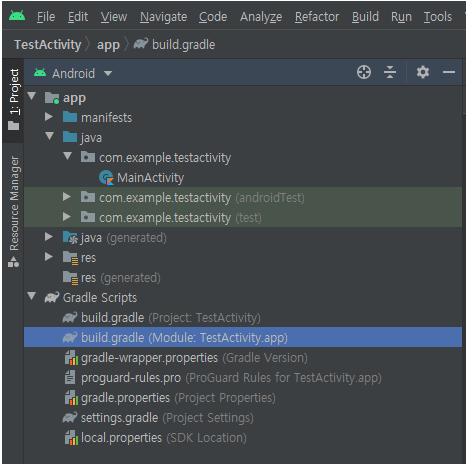
Gradle Scripts -> build.gradle(Module: TestActivity.app)을 클릭해줍니다.
dependencies {
    implementation fileTree(dir: "libs", include: ["*.jar"])
    implementation "org.jetbrains.kotlin:kotlin-stdlib:$kotlin_version"
    implementation 'androidx.core:core-ktx:1.3.2'
    implementation 'androidx.appcompat:appcompat:1.2.0'
    implementation 'androidx.constraintlayout:constraintlayout:2.0.4'
    implementation 'com.android.support:design:30.0.0' // ******이부분에 코드 입니다.*******
    testImplementation 'junit:junit:4.12'
    androidTestImplementation 'androidx.test.ext:junit:1.1.2'
    androidTestImplementation 'androidx.test.espresso:espresso-core:3.3.0'
}
build.gradle(Module: TestActivity.app)에 들어가게 되면 밑에 부분에 위 코드처럼 dependencies { }을 볼 수 있습니다.
dependencies{ } 안에 implementation 'com.android.support:design:28.0.0' 입력해주시면 라이브러리가 추가됩니다.
여기서 주의해야 할 점은 모든 Support 라이브러리의 버전은 같아야 하는 것입니다.
android {
    compileSdkVersion 30 // ******이부분이 compileSdkVersion입니다.*******
    buildToolsVersion "30.0.1"

    defaultConfig {
        applicationId "com.junjange.testactivity"
        minSdkVersion 28
        targetSdkVersion 30 // ******이부분이 targetSdkVersion입니다.*******
        versionCode 1
        versionName "1.0"

        testInstrumentationRunner "androidx.test.runner.AndroidJUnitRunner"
    }

    buildTypes {
        release {
            minifyEnabled false
            proguardFiles getDefaultProguardFile('proguard-android-optimize.txt'), 'proguard-rules.pro'
        }
    }
}
예를 들어 compileSdkVersion이 30, targetSdkVersion이 30이면 Support 라이브러리의 버전을 30.0.0으로 바꿔주면 됩니다. 반대로 Support 라이브러리의 버전이 28.0.0이라면 compileSdkVersion을 28, targetSdkVersion을 28로 바꿔주면 됩니다. 코드를 완성했다면 build.gradle에서 직접 입력하여 라이브러리를 추가하는 방법이 끝이 납니다.
그러면 이제 Tab layout과 View pager를 만들어 보도록 하겠습니다.
<?xml version="1.0" encoding="utf-8"?>
<RelativeLayout
    xmlns:android="http://schemas.android.com/apk/res/android"
    xmlns:app="http://schemas.android.com/apk/res-auto"
    xmlns:tools="http://schemas.android.com/tools"
    android:layout_width="match_parent"
    android:layout_height="match_parent"
    tools:context=".MainActivity">

    <androidx.viewpager.widget.ViewPager
        android:id="@+id/viewpager"
        android:layout_width="match_parent"
        android:layout_height="match_parent"
        android:layout_above="@+id/bottom_menu">
    </androidx.viewpager.widget.ViewPager>

    <com.google.android.material.tabs.TabLayout
        android:id="@+id/bottom_menu"
        android:layout_width="match_parent"
        android:layout_height="40dp"
        android:layout_alignParentBottom="true"
        android:layout_marginBottom="0dp"
        android:background="#FFFFFF"
        android:elevation="5dp"
        app:tabIndicatorColor="#000000">

    </com.google.android.material.tabs.TabLayout>

</RelativeLayout>
layout -> activity_main.xml 들어가서 위 코드를 작성해줍니다. 작성한 내용은 Tab layout을 맨 밑에 고정시킨 것이고 Tab layout 위에 View pager를 올려놓은 것입니다. 위 코드에서는 Relativelayout을 사용했지만, Linearlayout이나 Constraintlayout 등 앱을 구현하면서 편한 걸로 하면 됩니다.
다음으로는 navigation bar의 뷰가 될 xml을 만들어보도록 하겠습니다.
이 xml을 통해 텍스트와 아이콘 등을 넣어 원하는 하단 탭 바 모양을 설정할 수 있습니다.
<?xml version="1.0" encoding="utf-8"?>
<LinearLayout
    xmlns:android="http://schemas.android.com/apk/res/android"
    android:layout_width="match_parent"
    android:layout_height="56dp"
    android:background="#ffffff"
    android:elevation="5dp"
    android:orientation="horizontal">

    <RelativeLayout
        android:id="@+id/navi_home"
        android:layout_width="match_parent"
        android:layout_height="match_parent"
        android:layout_weight="1">

        <ImageView
            android:layout_width="wrap_content"
            android:layout_height="wrap_content"
            android:layout_centerInParent="true"
            android:paddingBottom="10dp"
            android:paddingTop="10dp"
            android:src="@drawable/navi_home" />
    </RelativeLayout>

    <RelativeLayout
        android:id="@+id/navi_my_page"
        android:layout_width="match_parent"
        android:layout_height="match_parent"
        android:layout_weight="1">
        <ImageView
            android:layout_width="wrap_content"
            android:layout_height="wrap_content"
            android:layout_centerInParent="true"
            android:paddingBottom="10dp"
            android:paddingTop="10dp"
            android:src="@drawable/navi_my_page" />
    </RelativeLayout>

    <RelativeLayout
        android:id="@+id/navi_other"
        android:layout_width="match_parent"
        android:layout_height="match_parent"
        android:layout_weight="1">
        <ImageView
            android:layout_width="wrap_content"
            android:layout_height="wrap_content"
            android:layout_centerInParent="true"
            android:paddingBottom="10dp"
            android:paddingTop="10dp"
            android:src="@drawable/navi_other" />
    </RelativeLayout>

    <RelativeLayout
        android:id="@+id/navi_map"
        android:layout_width="match_parent"
        android:layout_height="match_parent"
        android:layout_weight="1">
        <ImageView
            android:layout_width="wrap_content"
            android:layout_height="wrap_content"
            android:layout_centerInParent="true"
            android:paddingBottom="10dp"
            android:paddingTop="10dp"
            android:src="@drawable/navi_map" />
    </RelativeLayout>


</LinearLayout>
위 코드를 보게 되면 ImageView를 통해 하단 탭 바의 아이콘을 넣어주었습니다. 이때, 하단 탭바 아이콘을 클릭했을 때와 안 했을 때 아이콘 모양을 바꿔주기 위해 drawable에 selector.xml를 만들었습니다.
클릭을 했을 때 아이콘을 바뀌게 하고 싶지 않다면 기본 아이콘이나 텍스트 등으로 구현해도 됩니다.
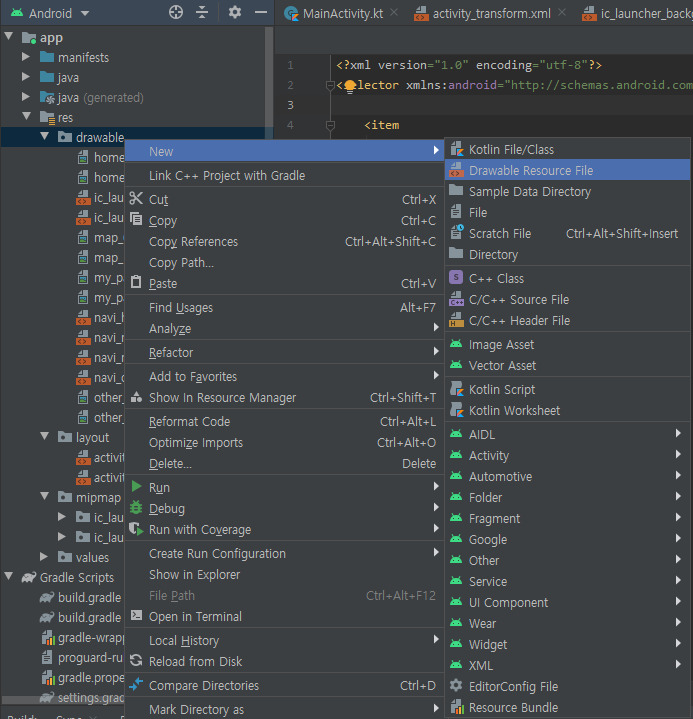
아이콘을 클릭했을 때 아이콘 모양을 바꿔주기 위해서는 위 사진처럼 drawable -> New -> Drawable Resource Flie을 클릭하여 selector.xml를 만들어 주고 이름을 설정하면 됩니다.
<?xml version="1.0" encoding="utf-8"?>
<selector
xmlns:android="http://schemas.android.com/apk/res/android">

    <item
        android:drawable="@drawable/home_0"
        android:state_selected="false"/>
    <item
        android:state_selected="true"
        android:drawable="@drawable/home_1" />

</selector>
selector.xml를 만들었다면 위 코드처럼 state_selected가 false일 때는 클릭하지 않았을 때의 아이콘을 넣고 state_selected가 true일 때는 클릭했을 때 보이는 아이콘을 넣어주면 됩니다. 이렇게 필요한 아이콘을 만들어주면 됩니다.
그럼 다음으로는 Fragment를 통해 viewpager를 4개의 페이지로 만들어 보도록 하겠습니다.
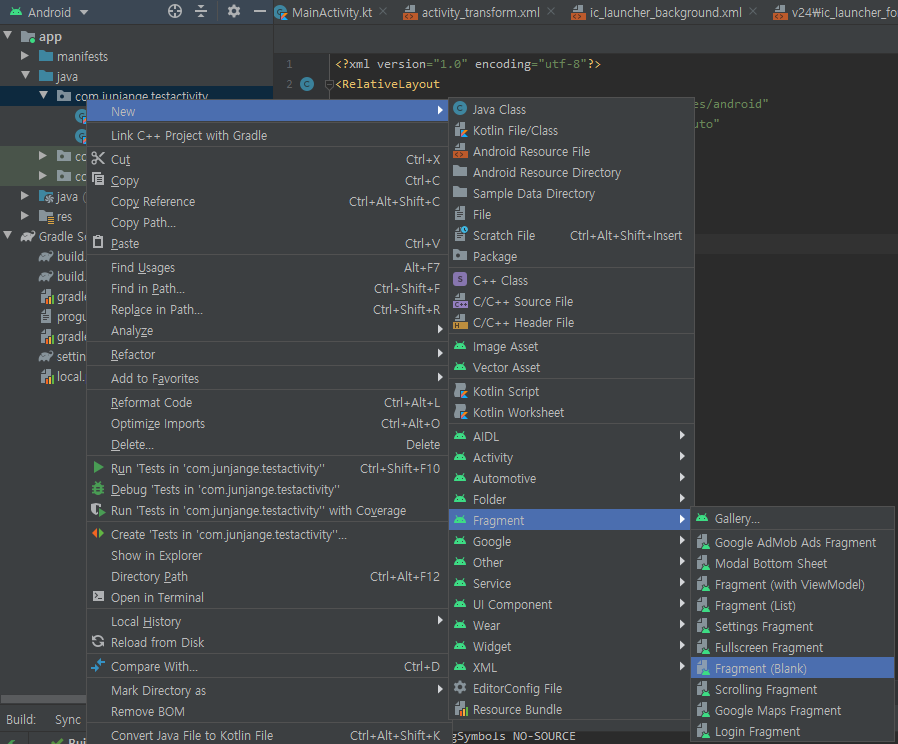
New -> Fragment -> Fragment(Blank)를 클릭해줍니다.
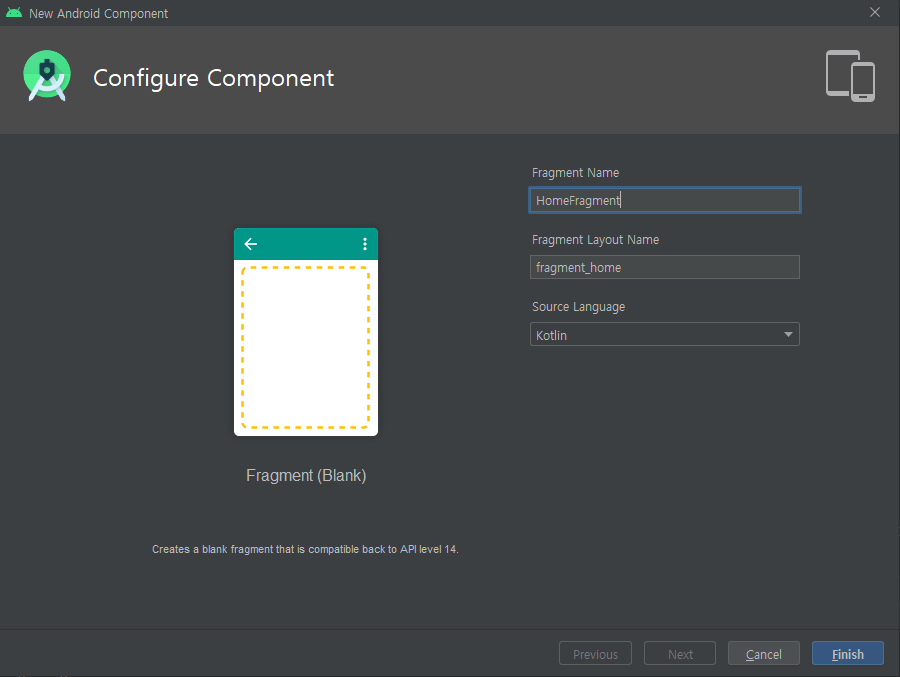
위 사진처럼 나오게 되면 Fragment 이름을 설정해주어 생성해줍니다.
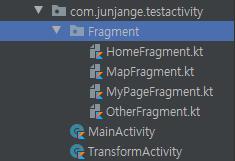
이때, 4개의 페이지를 만들 것이기 때문에 4개의 Fragment를 생성해줍니다.
다음으로는 adapter를 만들어보도록 하겠습니다.
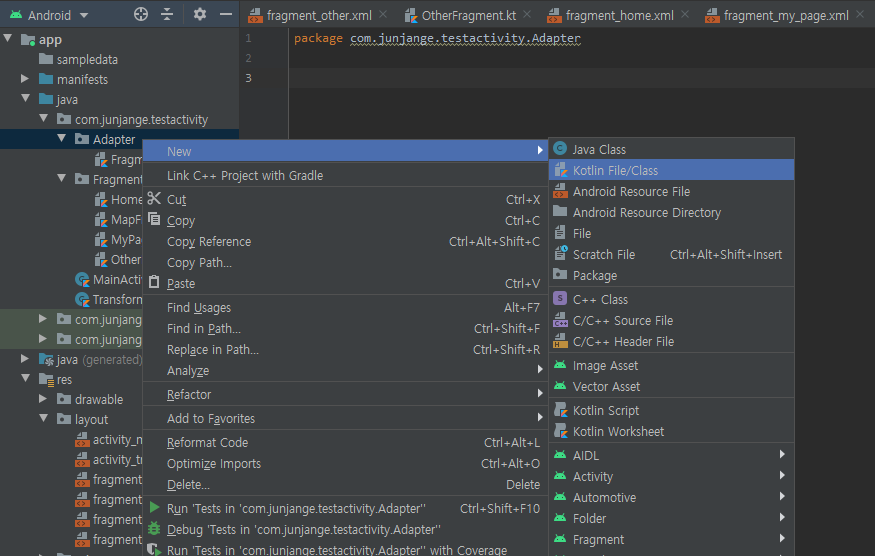
Adapter 패키지를 하나 만들고 그 안에 New -> kotlin File/Class를 클릭해 FragmentAdapter라는 Adapter를 생성해줍니다.
class FragmentAdapter(fm : FragmentManager, val fragmentCount : Int) : FragmentStatePagerAdapter(fm) {
    override fun getItem(position: Int): Fragment {
        when(position){
            0 -> return HomeFragment()
            1 -> return MyPageFragment()
            2 -> return OtherFragment()
            3 -> return MapFragment()
            else -> return Fragment()
        }
    }

    override fun getCount(): Int = fragmentCount

}
위 코드를 FragmentAdpater에 입력해주고 빨간 줄이 생긴다면 import를 해줍니다.
다음으로 MainActivity로 넘어가 줍니다.
class MainActivity : AppCompatActivity() {
    override fun onCreate(savedInstanceState: Bundle?) {
        super.onCreate(savedInstanceState)
        setContentView(R.layout.activity_main)

          configureBottomNavigation()
    }

    private fun configureBottomNavigation(){
        viewpager.adapter = FragmentAdapter(supportFragmentManager, 4)

        bottom_menu.setupWithViewPager(viewpager)

        val bottomNaviLayout: View = this.layoutInflater.inflate(R.layout.activity_transform, null, false)

        bottom_menu.getTabAt(0)!!.customView = bottomNaviLayout.findViewById(R.id.navi_home) as RelativeLayout
        bottom_menu.getTabAt(1)!!.customView = bottomNaviLayout.findViewById(R.id.navi_my_page) as RelativeLayout
        bottom_menu.getTabAt(2)!!.customView = bottomNaviLayout.findViewById(R.id.navi_other) as RelativeLayout
        bottom_menu.getTabAt(3)!!.customView = bottomNaviLayout.findViewById(R.id.navi_map) as RelativeLayout

    }
}
위 코드를 MainActivity에 입력해줍니다.
코드를 완성했다면Tab layout과 View pager가 연결됩니다.
다음으로 Run을 하게 되면
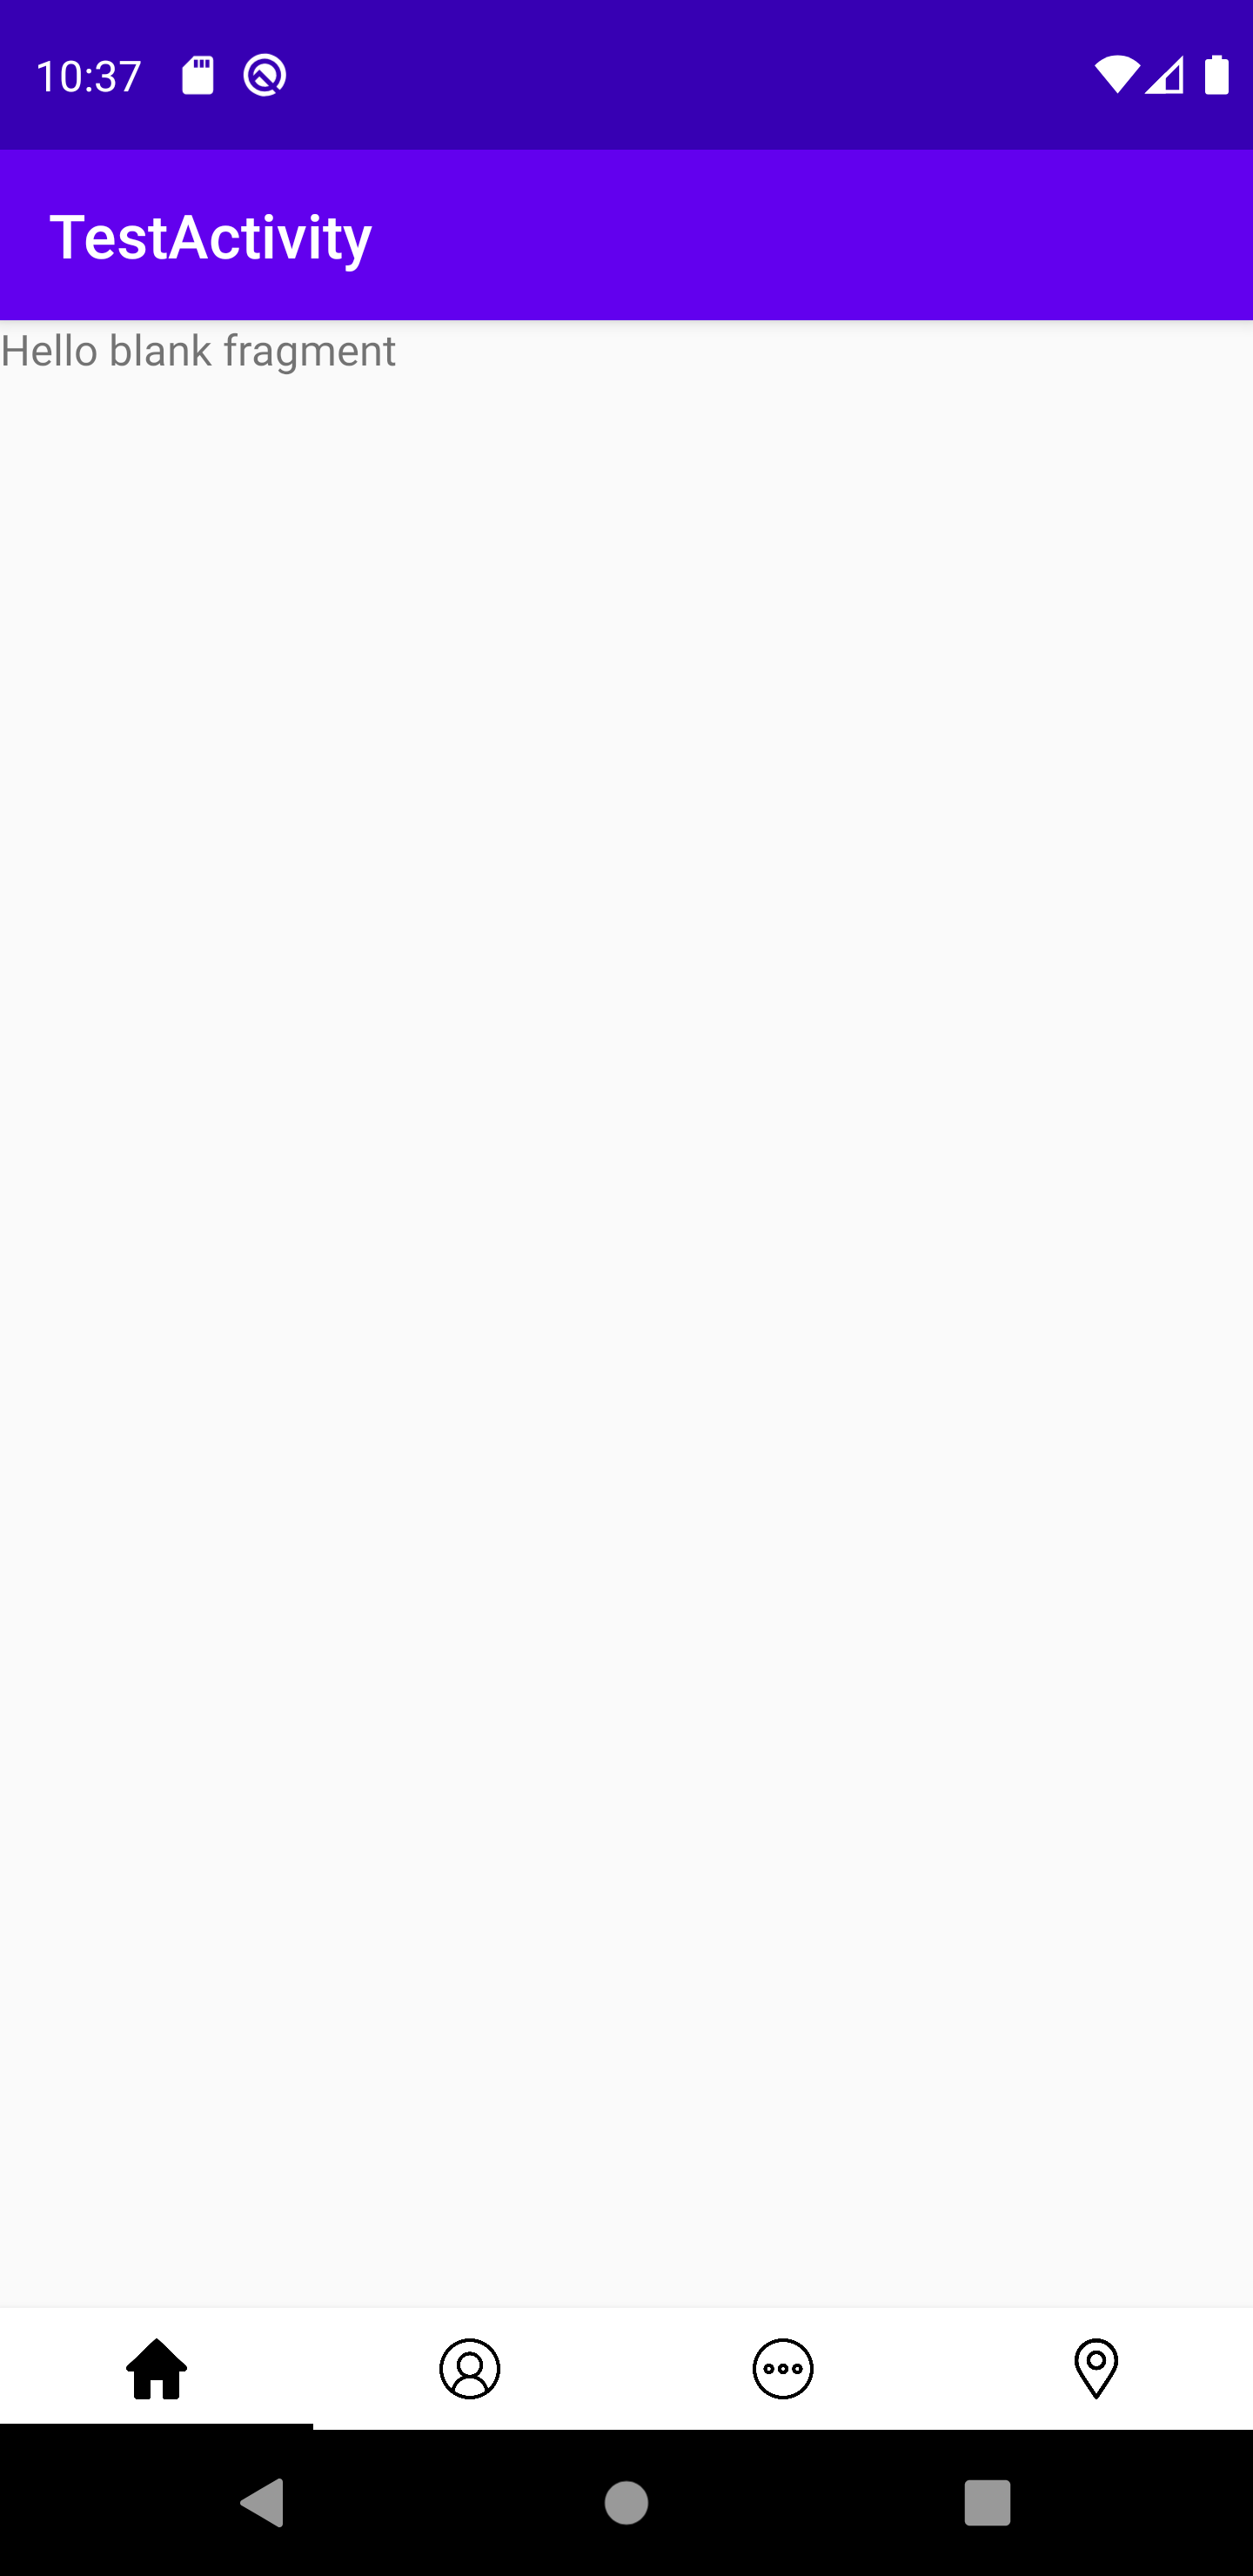
위 결과 화면처럼 나오게 됩니다.
github
junjange/Kotlin-Learning
코틀린 학습. Contribute to junjange/Kotlin-Learning development by creating an account on GitHub.
github.com
'Develop > Kotlin' 카테고리의 다른 글
| [kotlin] 코틀린 QR코드 스캐너 구현 (0) | 2021.07.03 |
|---|---|
| [kotlin] 코틀린 스플래시 스크린(splash screen) 구현 (0) | 2021.07.03 |
| [kotlin] 코틀린 Activity와 Fragment의 생명주기(lifecycle) (0) | 2021.02.05 |
| [kotlin] 코틀린 반복문(for, while, do -while) (0) | 2021.02.02 |
| [kotlin] 코틀린 조건문(if -else, when)과 비교 연산자 (0) | 2021.02.02 |


